“Daisho theme” documentation — version 4.2
Table of Contents
A) Installing the theme
Follow the steps to install the theme:
- Download the theme ("Installable WordPress file only") from https://themeforest.net/downloads (you must be logged in).
- Upload and activate the theme in Admin Panel → Appearance → Themes → Install Themes → Upload.
- Install the required plugins in Appearance → Install Plugins.
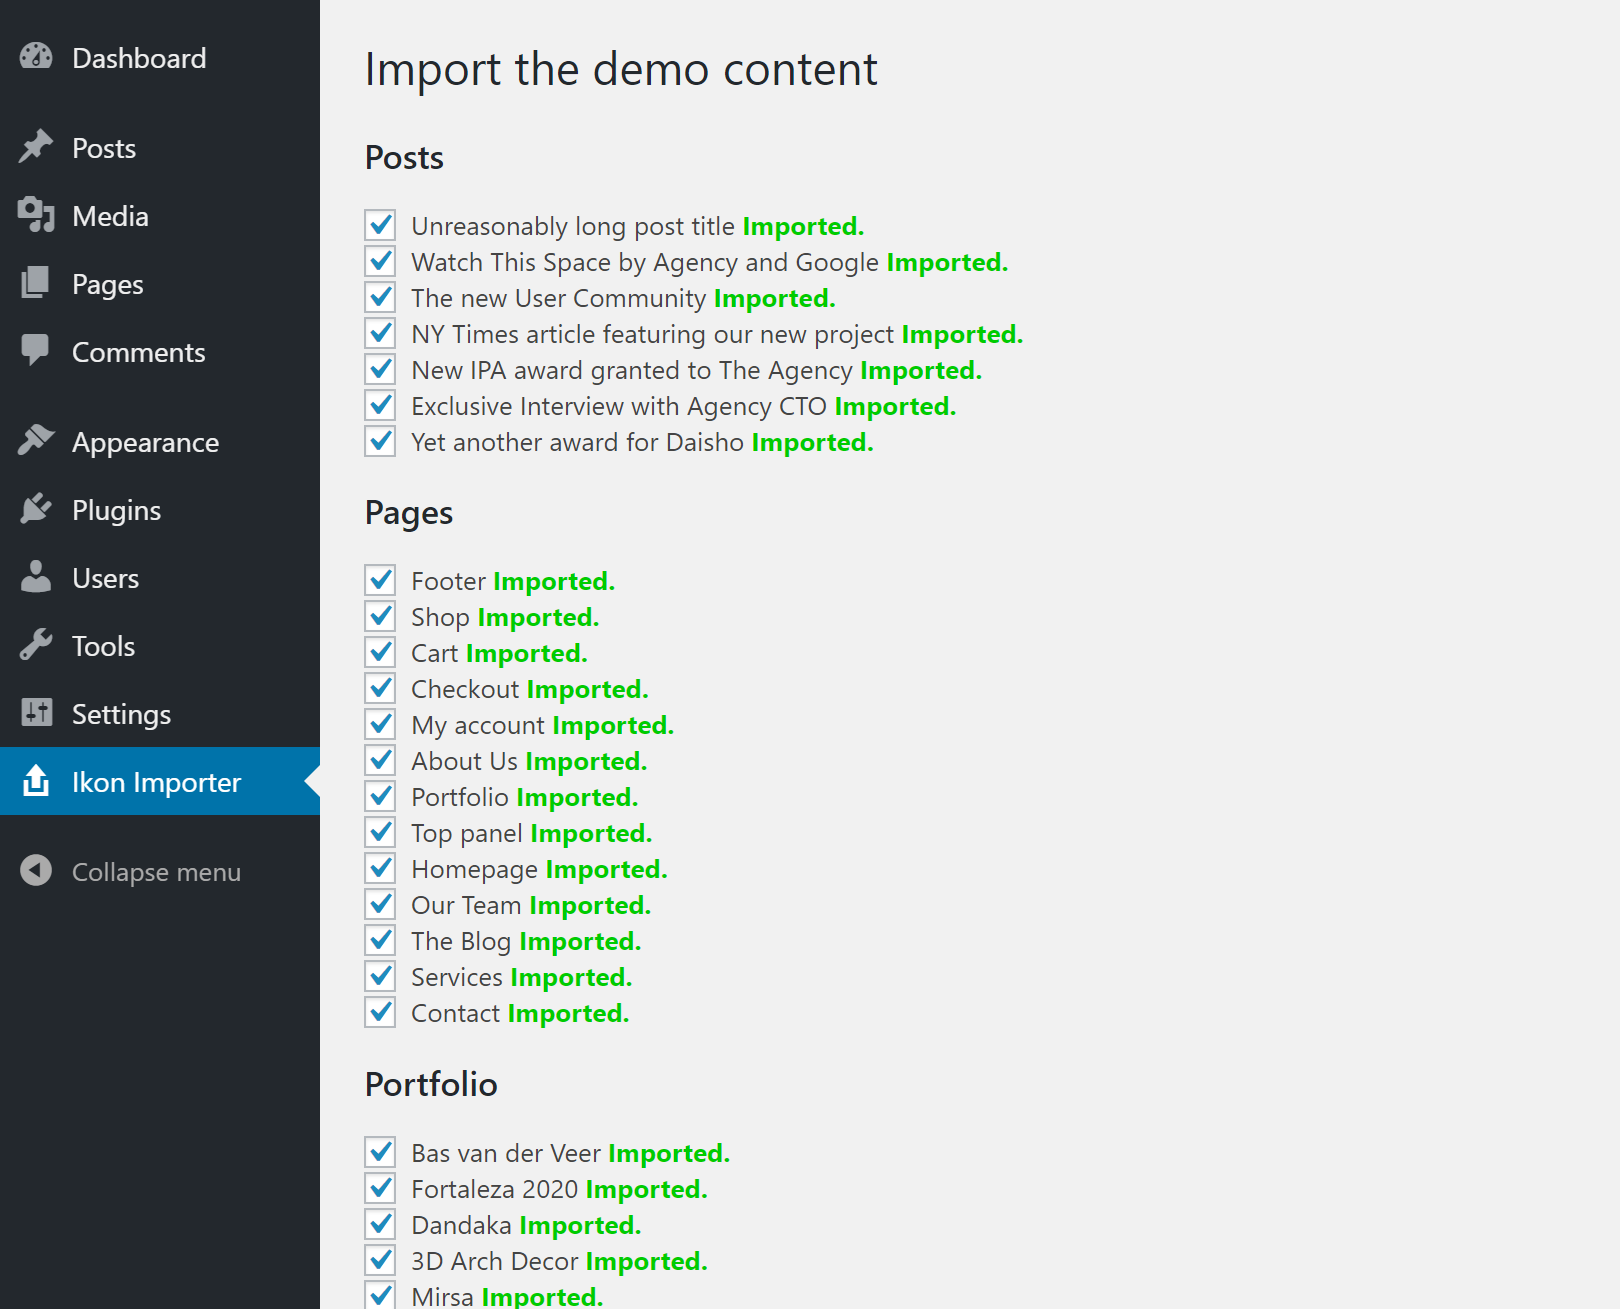
- Import the demo content in Admin Panel → Ikon Importer.
Common installation issues
-
Missing Stylesheet
If you have downloaded "All files and documentation" ZIP package from https://themeforest.net/downloads (instead of "Installable WordPress file only") unzip it. Inside you'll find another ZIP package with installable theme files.
-
Max upload filesize limit
Some servers allow only 2 MB files to be uploaded by default. To fix this, contact the server administrator and ask them to increase that to for example 64 MB. If you have access to php.ini you can modify
upload_max_filesizeandpost_max_sizeyourself. -
System requirements
- Your own shared or dedicated server (wordpress.com hosting doesn't allow custom themes).
- PHP 5.6 or newer (older PHP versions like 5.5 or 5.4 may partially work but eventually they won't, PHP 7.x is recommended).
- The newest stable WordPress version.
- Knowledge on how to use WordPress (e.g. how to enter the admin panel, how to write posts etc.). This may help you: New To WordPress — Where to Start.
B) Header
Follow the steps to enable the top drop-down panel:
- Create a new page in Pages → Add New (name it e.g. "Top panel") and put there some content. You can use headings, paragraphs and columns. Avoid using any content that changes its dimensions over time.
- Assign your newly created page in Theme Settings → General → Top Drop-down Panel.
Follow the steps to add an image logo to your website:
- Upload your image logo in Appearance → Customize → Site Identity.
- Supported formats: JPG, PNG, GIF and more (see get_allowed_mime_types()).
- Recommended format: SVG (can be enabled with plugins, see #24251).
- If not uploaded, your Appearance → Customize → Site Title and Appearance → Customize → Tagline will be displayed.
Follow the steps to create your main menu:
- Create a new menu in Appearance → Menus.
- Attach your newly created menu to the "Main Menu" location to make it appear on the front-end.
- Optionally specify one of the below icon CSS classes for individual menu items using the available "CSS Classes (optional)" field.
- If you don't see "CSS Classes (optional)" field you can enable it in the top, right corner in "Screen Options".
- You can use Modern Pictograms icons with
modernpicrograms-CSS class prefix or FontAwesome 4.7.0 icons withfa-CSS class prefix.
C) Pages
The theme comes with several pre-defined pages which you can preview and import in Admin Panel → Ikon Importer. They will be imported to Pages → All Pages where you can edit them.
Front page
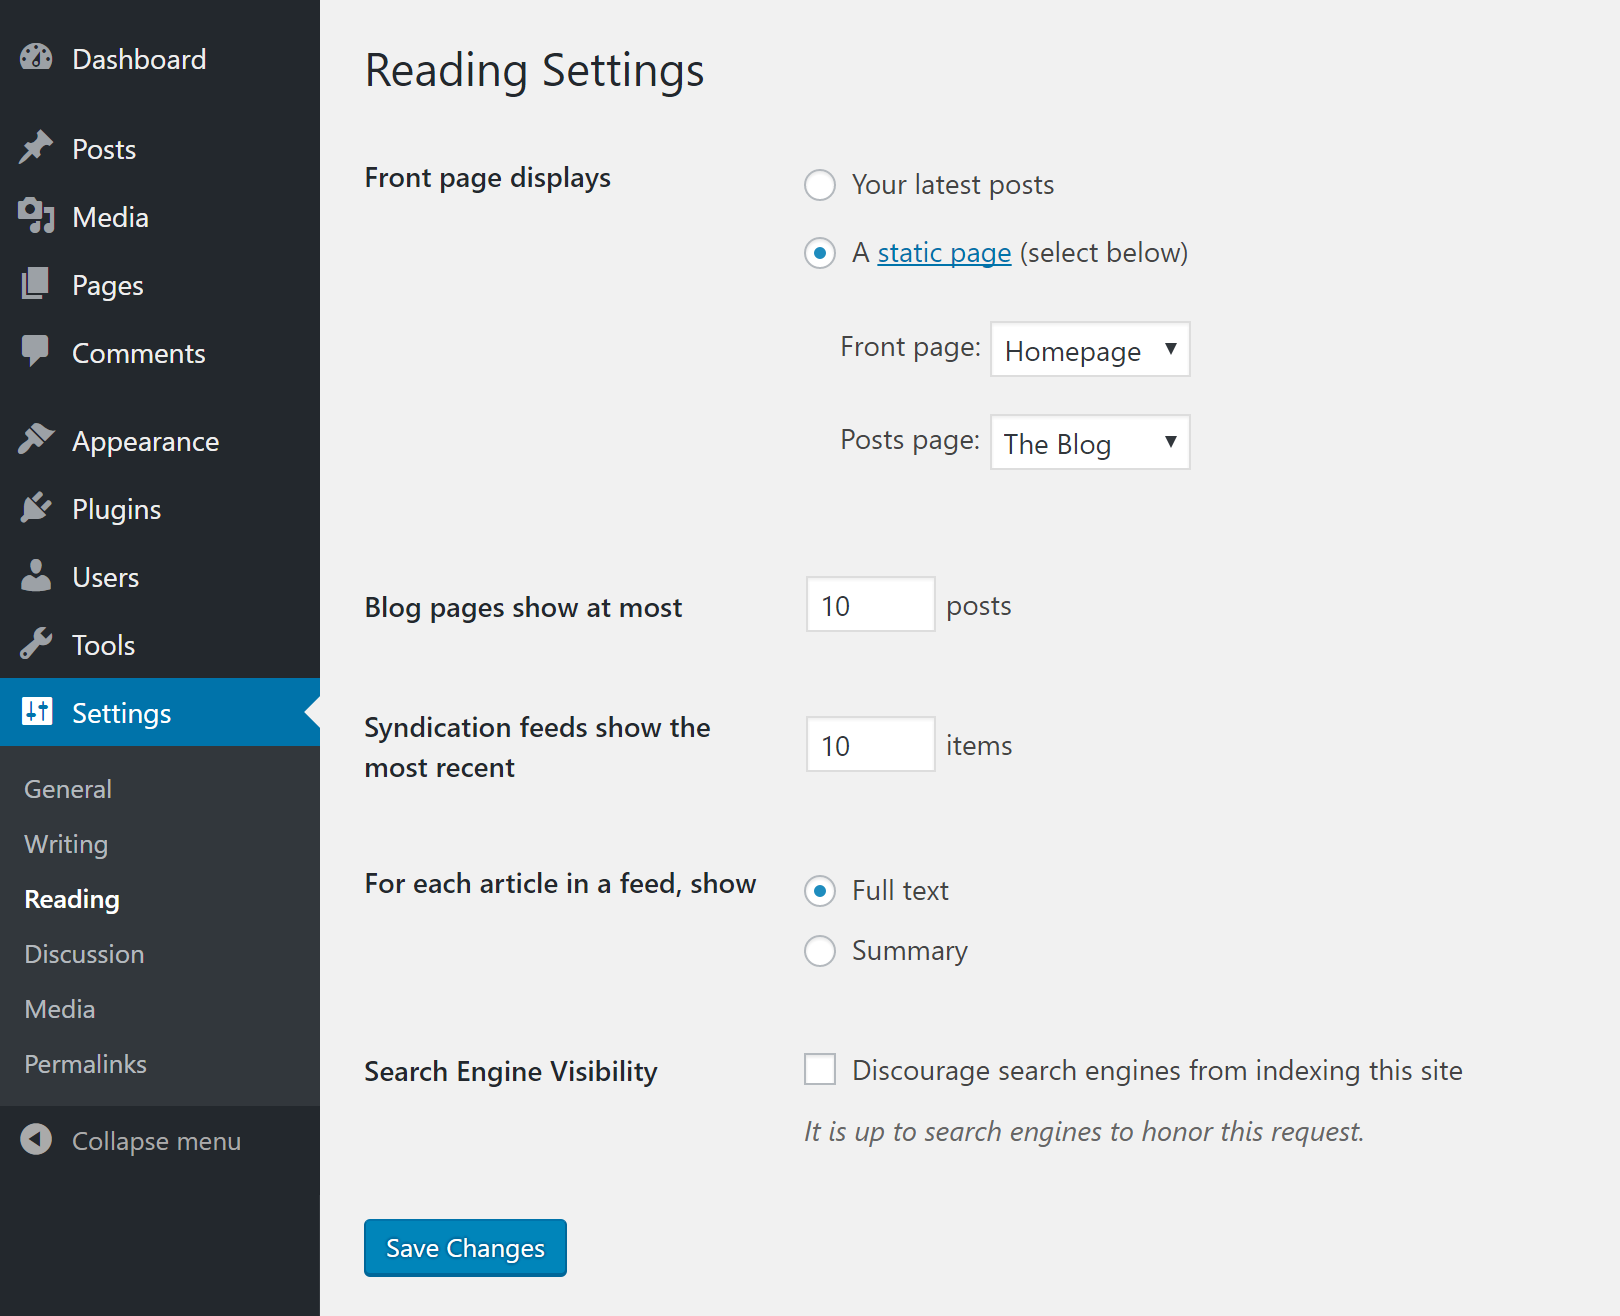
Your blog is your front page by default. You can move it to a subpage using Settings → Reading → Posts page and you can set a static page as your front page using Settings → Reading → Front page.
Common questions
-
How to disable comments on pages?
Newly created posts and pages will have comments open or closed depending on the value of
default_comment_statusoption which is editable in Settings → Discussion → Allow people to post comments on new articles.You can disable comments for individual posts or pages on the entry's edit screen (e.g. Pages → (any page) → Allow Comments). If the box with "Allow Comments" checkbox is not visible you can enable it in the top right corner in "Screen Options".
You can update multiple pages at once in Admin Panel → All Pages by selecting them and by picking "Edit" above the list in "Bulk Actions" drop-down menu.
-
Why does my blog display the whole posts' content?
You have three options:
- Your blog will display full posts with HTML formatting enabled by default.
- Using the more tag will produce "Continue Reading..." message and will cut the post.
- You can also specify a manual excerpt in Posts → Add New → Excerpt and this will be shown instead. If you don't see the "Excerpt" box you can enable it in the top right corner in "Screen Options".
D) Blocks
The theme and the bundled plugins add the following new blocks to your editor:
Additional CSS classes that you can assign to blocks:
E) Sidebar
-
Enabling the sidebar globally
Adding widgets to Appearance → Widgets → Sidebar 1 will enable the sidebar on the entire website (index.php, page.php, single.php, archive.php, search.php) except for the WooCommerce shop page.
Adding widgets to Appearance → Widgets → Shop sidebar will enable the sidebar on the WooCommerce shop page.
-
Enabling the sidebar only on selected pages
Follow the steps to show the sidebar only in the selected by you places (e.g. selected by you pages, posts, archives, search results etc.):
- Delete all widgets from Appearance → Widgets → Sidebar 1. (This will disable the sidebar on your website.)
- Go to Plugins → Add New.
- Install and activate WooSidebars plugin.
- Go to Appearance → Widget Areas.
- Create a new widget area (named e.g. "My new sidebar").
- Select where it should be displayed (e.g. only on your "About" and "Contact" pages).
- "Sidebar to Replace" must be set to default "Sidebar 1".
- Publish it.
- Go to Appearance → Widgets.
- Add widgets to "My new sidebar". (As soon as you add widgets your widget area will appear on your "About" and "Contact" pages.)
You can create and assign unique widget areas to individual pages in this way.
-
Changing the sidebar placement to the right side
The sidebar is left-aligned by default. Follow the steps to change the placement of your sidebar to the right:
- Go to Pages → (your page).
- Create Theme: Page settings block anywhere in the content.
- Change the placement of your sidebar between left and right in the block's options.
F) Footer
You can assign any page to be your footer in Theme Settings → General → Footer page.
G) Support
If you need further help follow the steps below to resolve your issue:
- Check the FAQ
 and existing support topics .
 - Check the changelog and download and install the newest development version of the item and see if it solves your issue.
- If none of the above steps helped contact us. We respond in accordance with the item support policy. If your question includes a custom modification request visit the relevant FAQ page first.